Thursday, January 31, 2008

Bag it Up.


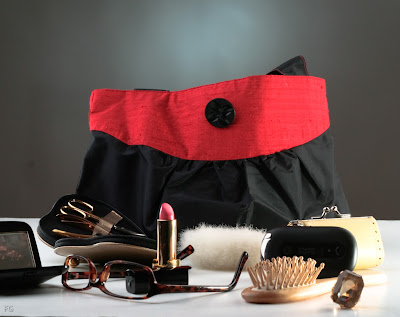
My first foray in object photography. This is a line of bags with a vintage look. So I decided they should not look too blingy, but rather have a bit of an understated tone.

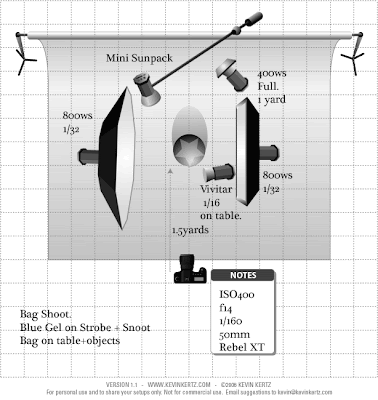
The setup is here on the left. It is a bit complicated, but not really. A snooted strobe with a blue gel to give the "halo"
on the background. Two softboxes to give uniform light and two small strobes (the one on the left with gobos, the one on the right with a mini diffuser) to add a bit of edge and sparkle to the objects.

Tuesday, January 8, 2008

Skin Retouching


I am following this very detailed walkthrough .

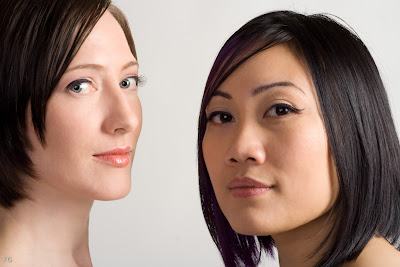
This a nice shot of Justice and Robin (make up Kristin Von Claret) after some basic skin retouching with the healing tool and the procedure described in the above link.

Obscure notes to self: if I had to burn or dodge some specific areas:
- layer
- create a new layer
- overlay
-fill with 50% gray

When it is time to create the skin mask for the filters involved in the skin retouching (Lens Blur and High pass) go to the Channels Palette. Make an Alpha Channel and erase/burn as desired. Then turn your newly remodeled Alpha Channel/Mask into a selection: Go back to the Layers Palette and, making sure your layer (I use the top layer that contains all the sublayers) is the Active Layer, click on the third-from-the-right-button on the bottom of the Layers Palette which will turn your still-selected new Alpha Channel into that Layer's new Layer Mask. (this last detail is not in the skin retouching howto).

Tuesday, October 30, 2007

Photographers prefer Brunettes


Professional, beautiful, easy to work with, on time. What could I ask for more? Oh yes a great stylist.

The b/w was done with the model reclining on the couch (Pillow is for Posture!). Flood high above turned down quite a bit. 50mm at f2.5, 1/160th, ISO100. Tiny flash (and stylist!) hiding just a foot behind. Photoshop: add a layer with a 10px gaussian blur, mask eyes and lips. Fix small blemishes on the main photo. Merge layers. Unsharp mask. A little subtler than previous attempt.

Red Shirt: Easy. Vivitar high on camera left, power 1/16th. added mini softbox. White reflective board at lower right. I almost botched the shot though. Best focus is on lips rather than eyes!

High Key: The big softbox set up as discussed a couple of posts ago. A little off center so the left side gets less light. Or I could have added a semi transparent gobo. f2.5


Model: Robin

Stylist: Kristin Von Klaret

Monday, October 22, 2007

Lighting for Portraiture: Combination 8


"Lighting for Portraiture (Walter Nurber, The Focal Press, 1948) is a classic manual for "Retro" portraits. Each pose is illustrated in painful detail ..all 64 of them. The book is written for tungsten lighting, but it can easily be used with modern strobes. I really like this book, got from Amazon for $15. So I decided to slowly reproduce every combination. It will take a while.
We start with C8, which is good for men. Picture and diagram as follow.


Camera set on 1/160th/f6.8/ISO100. 50mm lens.
- 800wsec Flood: 1/16th at 35deg, 10 feet from subject, 6feet from ground. light "feathering" body and face.

- Vivitar: 1/16th, on the ground, 2feet from dark wall, pointing up, gobo to limit light towards ceiling.

Note for 'd be models: to get the right look stare at the camera and turn eyes left and up, keeping neck still.
Framing the shoulder on camera left is important for the mood of the shot. Keeping the flood as far as possible makes shadows harder. Nose shadow: do not let it touch the upper lip (a capital crime in the 40ies...). The original portrait used a snoot on the flood light so the look is a little more low key and dramatic there.

Friday, October 19, 2007

Looking Rita

One more "Retro" portrait.
The light scheme is straightforward, with camera setting: 40mm, ISO100, 1/160th, f10? The neck shadow took a bit to get right. The flood should have been further back for stronger shadows.


The soft focus effect was achieved in Photoshop.

- some basic cloning for skin blemishes
- Gaussian blur 10px
- Gaussian Fade 50%
- unsharp m. at 120%
- added bluish duotone.


The lights setting is similar to the "Bogart" set, but not quite. The flood is set much higher over the model.

Model: Brittney Bush Bollay.

Monday, October 15, 2007

Close Ups


This is a rather "en vogue" style for portraiture these days, easy to achieve if you have a softbox (or a ringflash). Of course having a subject with big eyes helps......
So this is how I did it.

The trick it is to keep subject, lens, light as close as possible to each other.


0) I mounted a 50mm lens on your camera. My settings were: 1/160th,ISO100,f1.8 (or the smallest fstop you can afford). That will make your depth of field SMALL. We are talking a fraction of an inch. The subject's nose and the eyebrows will be decidedly unsharp. Eyes have to be as sharp as possible for the portrait to work.

1) place subject seated in front of the largest softbox you have.
1b) use a uniform, white/light gray background.
2) place camera eye level as close as possible to subject while you can still focus (likely a couple of feet)
3) place softbox behind camera as close as possible to it.
4) use spot focusing on the subject eyes. Not the nose bridge!
5) take picture.

Postprocess:

- turn down red, magenta by %20. Increase blue by 10-20% This will increase skin detail.
- use curves to brighten mid-high tones. Darken the dark tones a bit.
- burn dark contour lines a bit (chin, neck)
- dodge eyes and hair a bit.
- unsharp mask the whole pic by at least 100%.


Wonder if I should have used a brigther background.

Model Credit: Brittney
Friday, October 12, 2007

How does he do this?


This is a self portrait of photographer Kevin Kertz.
How does he get the cartoonish look? I have seen this style around... I like it and will try to find out how it is done.

(added note: maybe the High Pass Filter is involved)